Service Contacts
Service@hotcoin.com
Product Feedback
Product@hotcoin.com
Business Cooperation
Business@hotcoin.com
Legal Contacts
Casecn@hotcoin.com
About us
Service
Support
©2017-2026
Service@hotcoin.com
Product@hotcoin.com
Business@hotcoin.com
Casecn@hotcoin.com
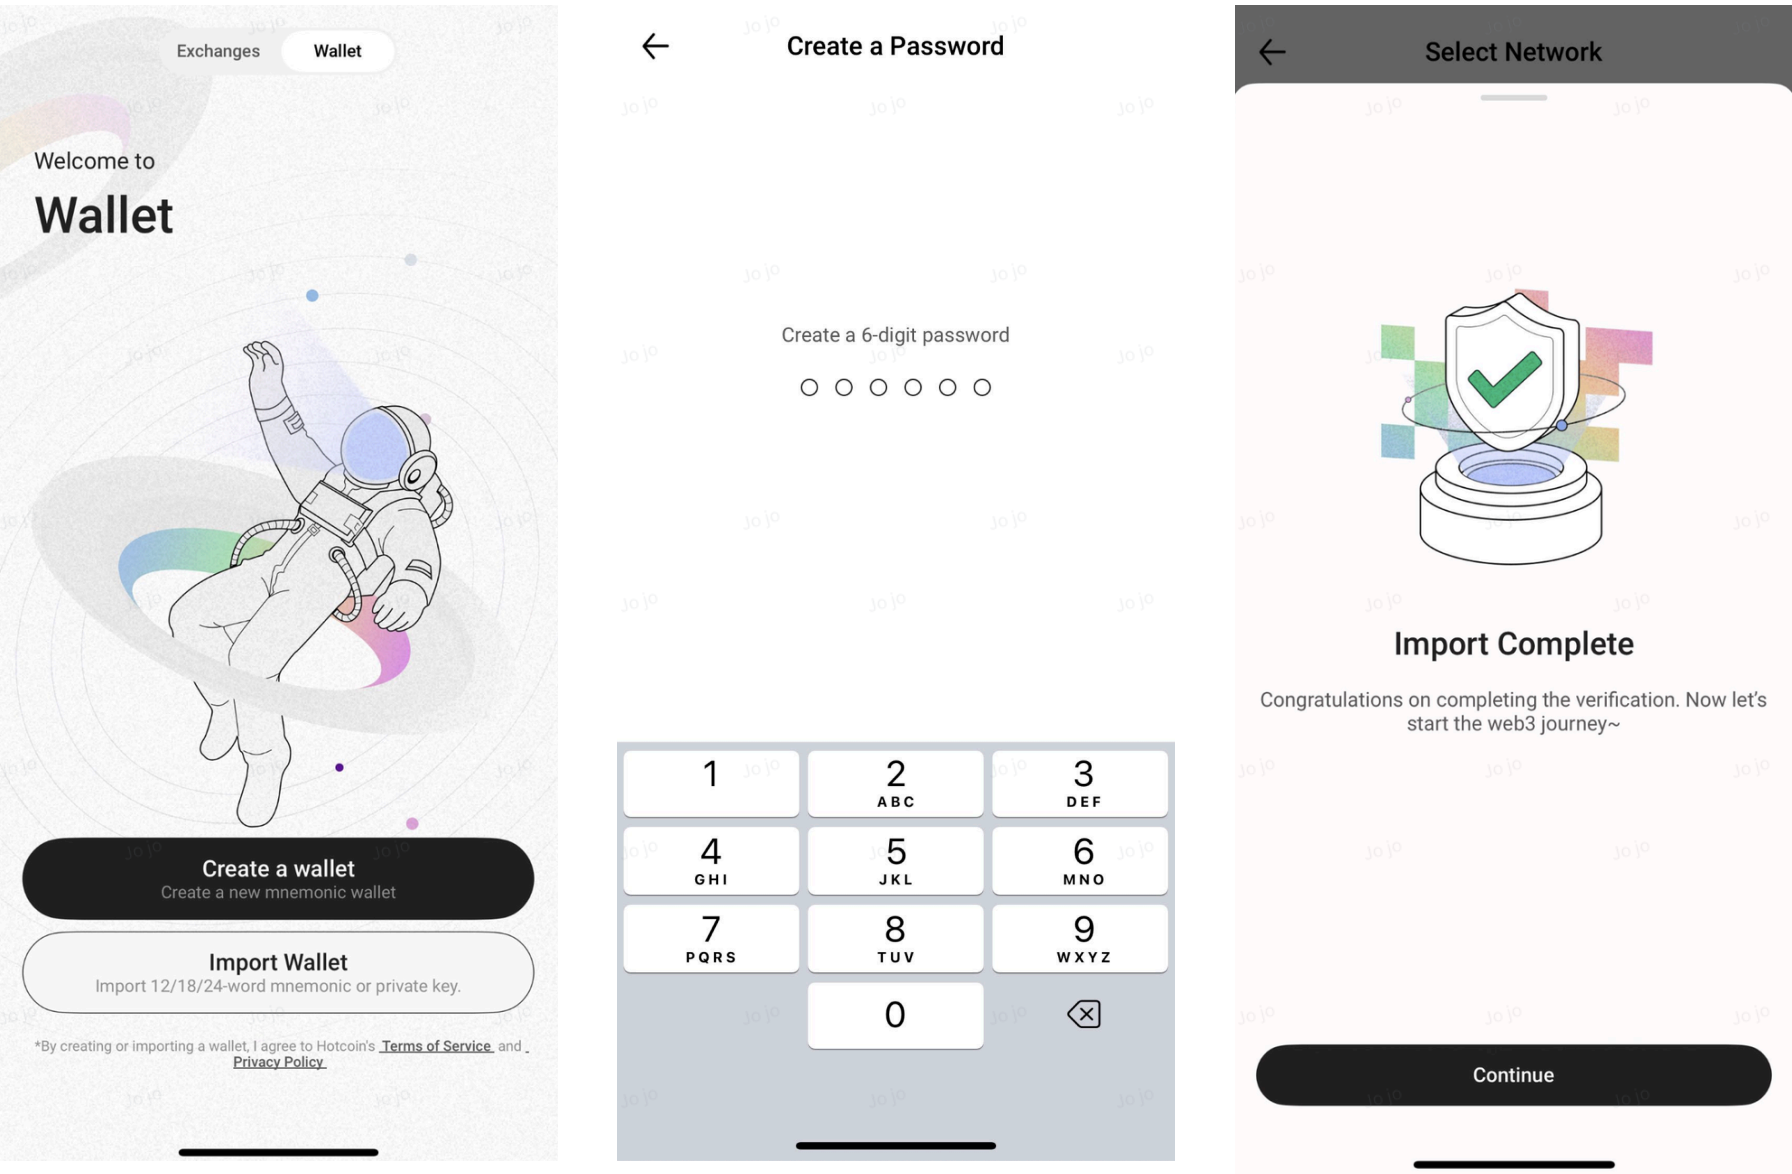
Step 1: Create or Import a Wallet
1. Tap Web3 at the top of the page to enter the Web3 section.
2. Select Create Wallet or Import Wallet.
3. Set a fund password to complete wallet creation or import.
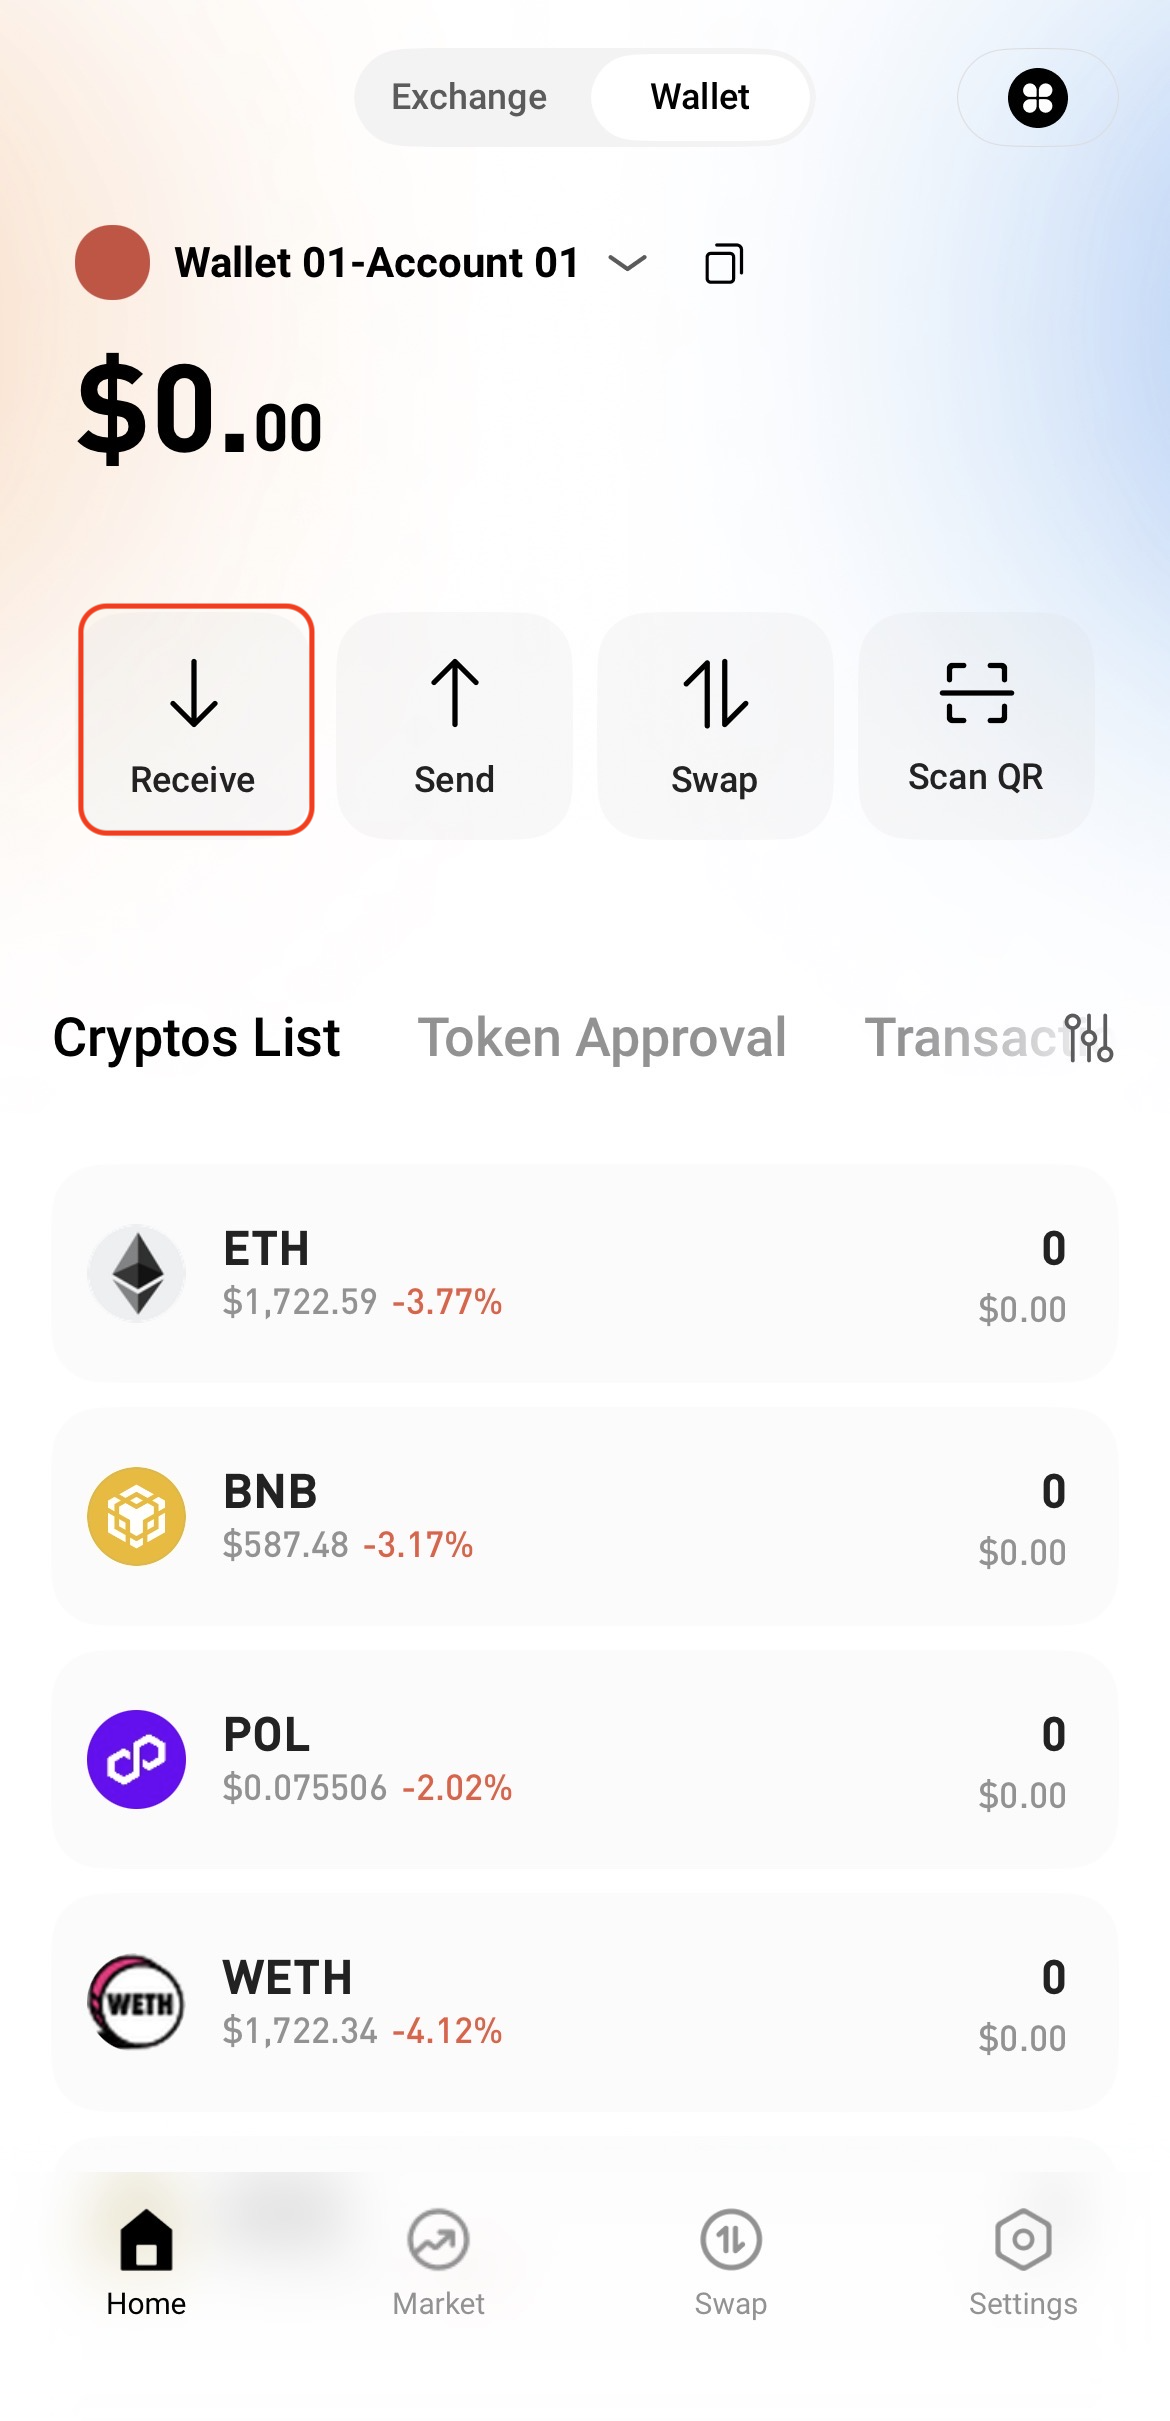
Step 2: Fund Your Wallet
After creating or importing your Hotcoin Web3 wallet, you can fund it with assets:
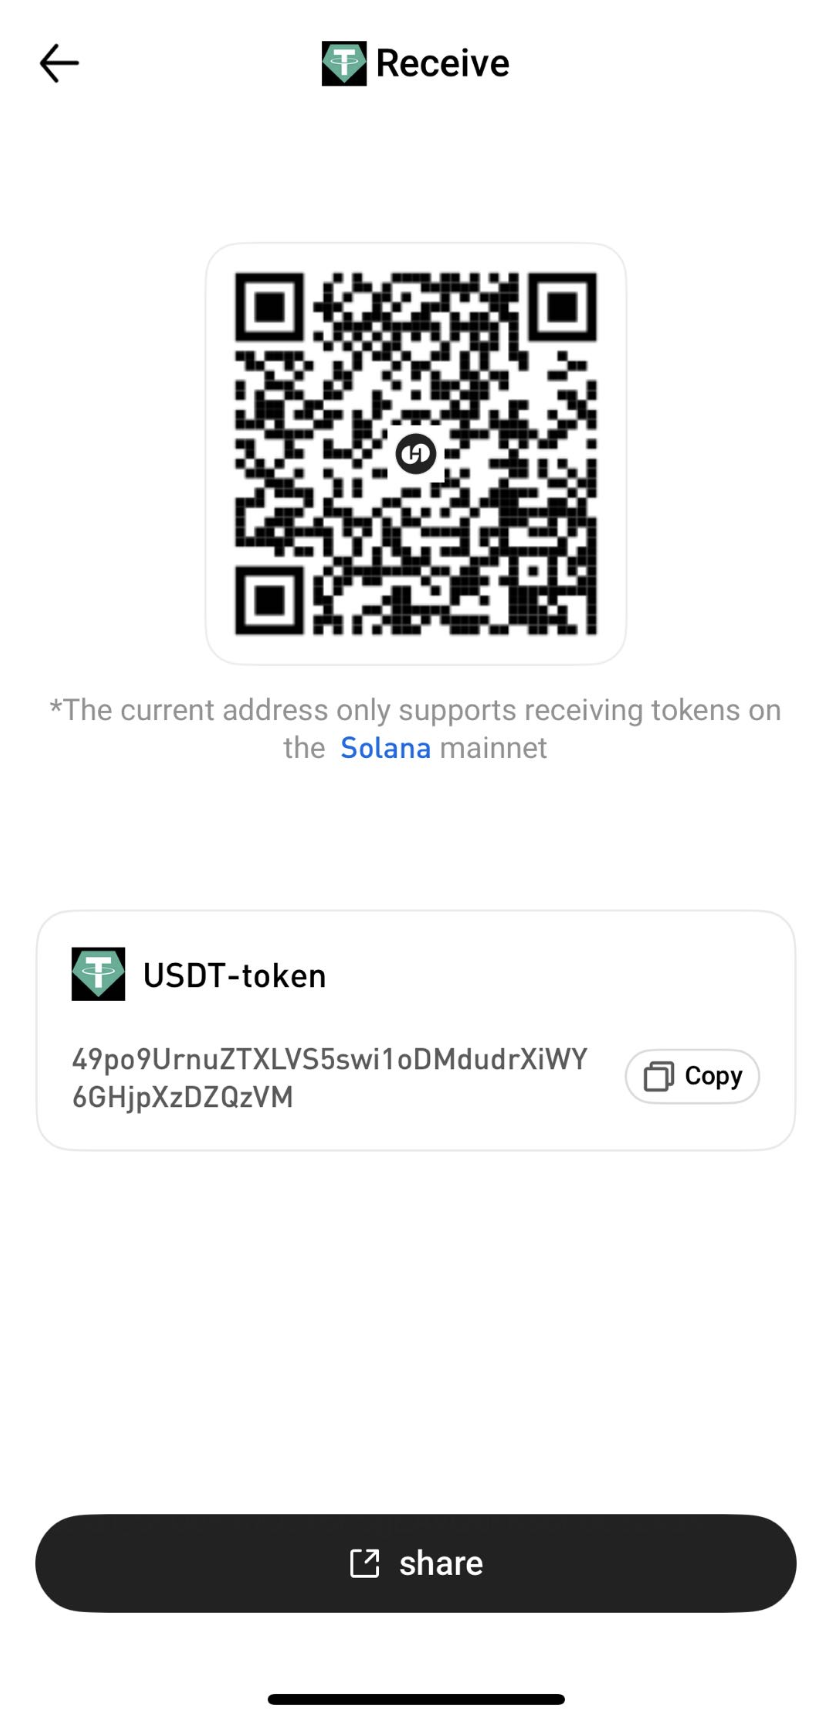
1. Tap Receive on the wallet homepage.
2. Select the token and network you wish to receive.
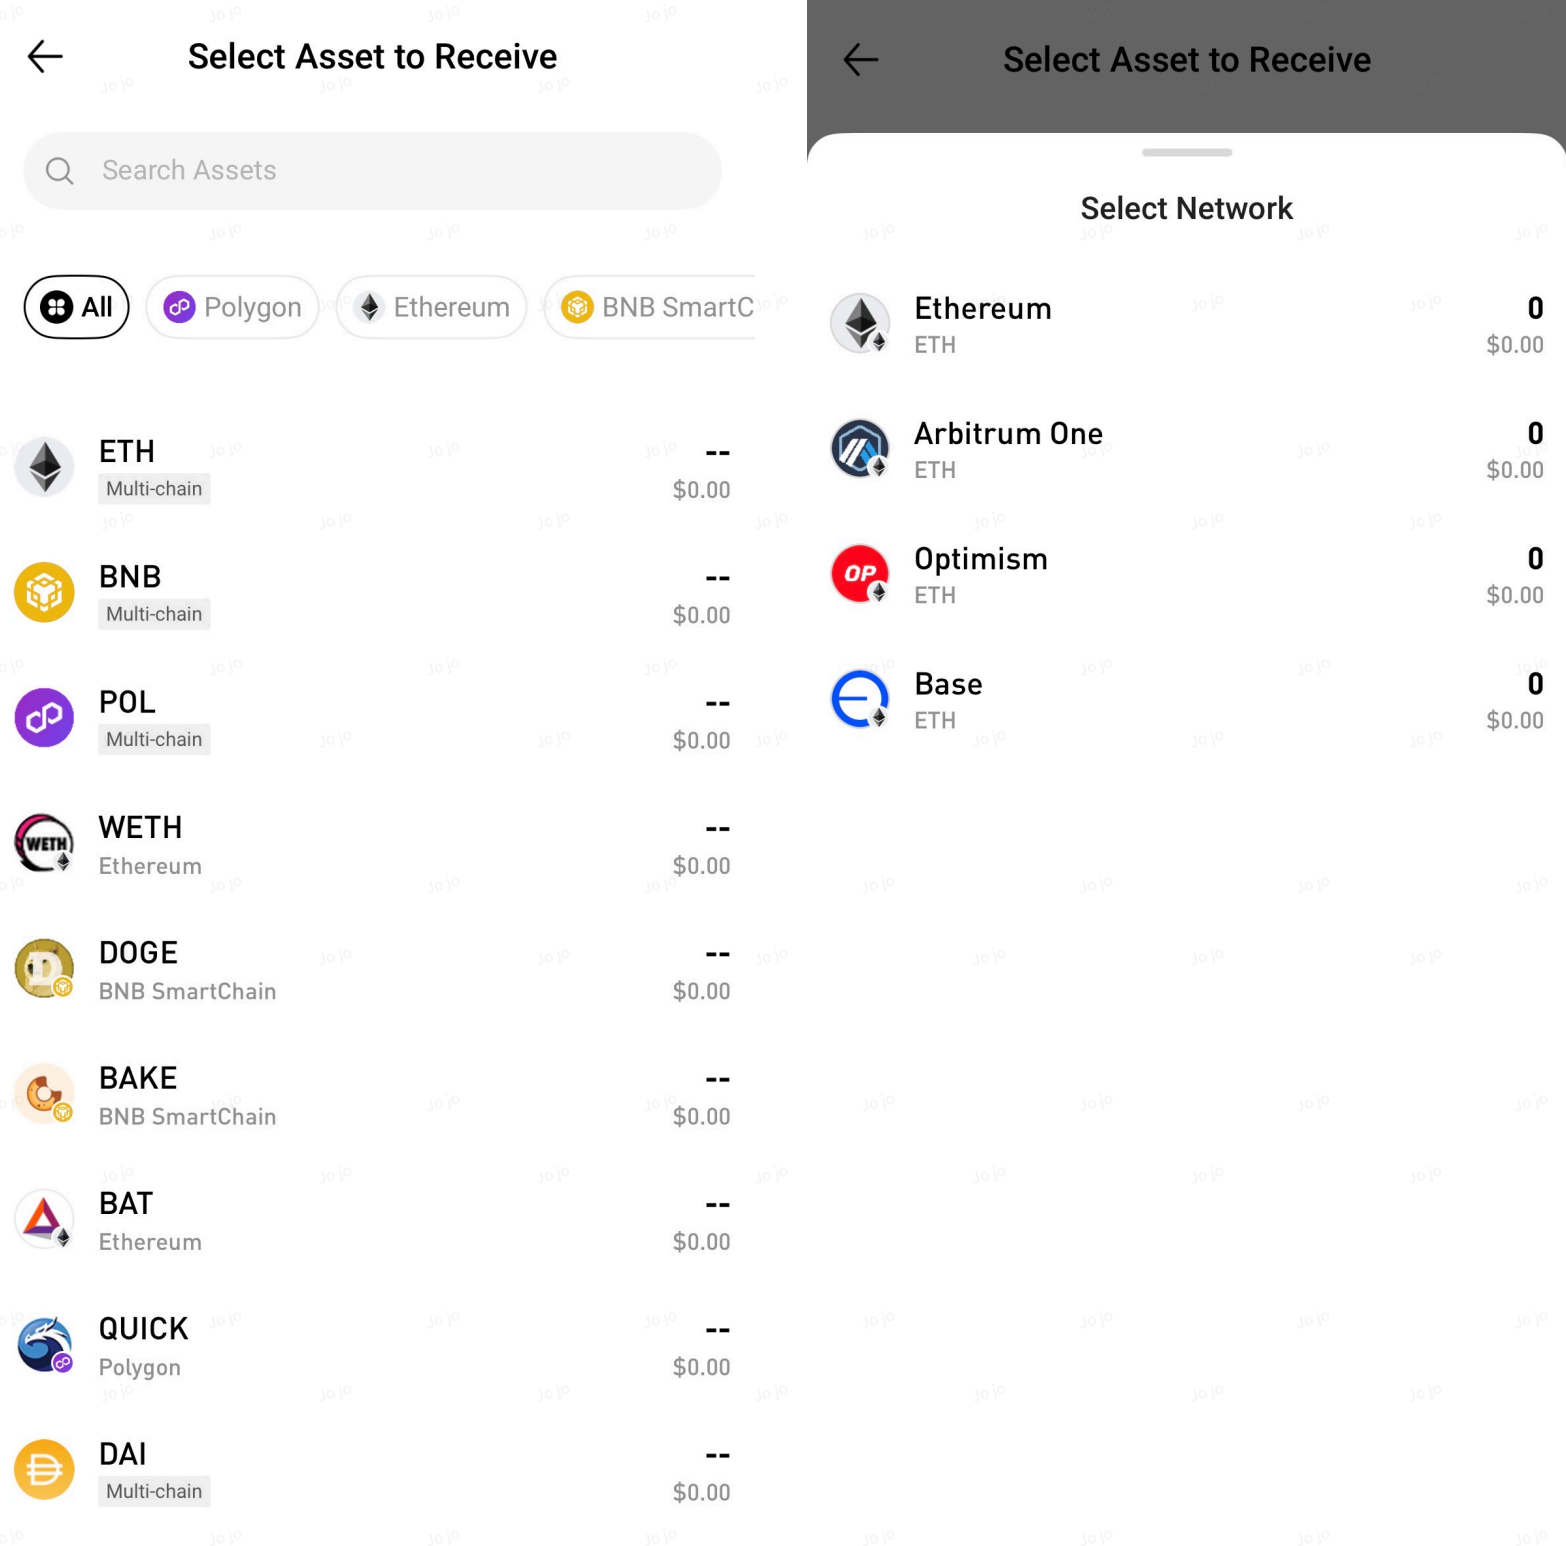
3. Copy the wallet address or scan the QR code to transfer assets to that address.
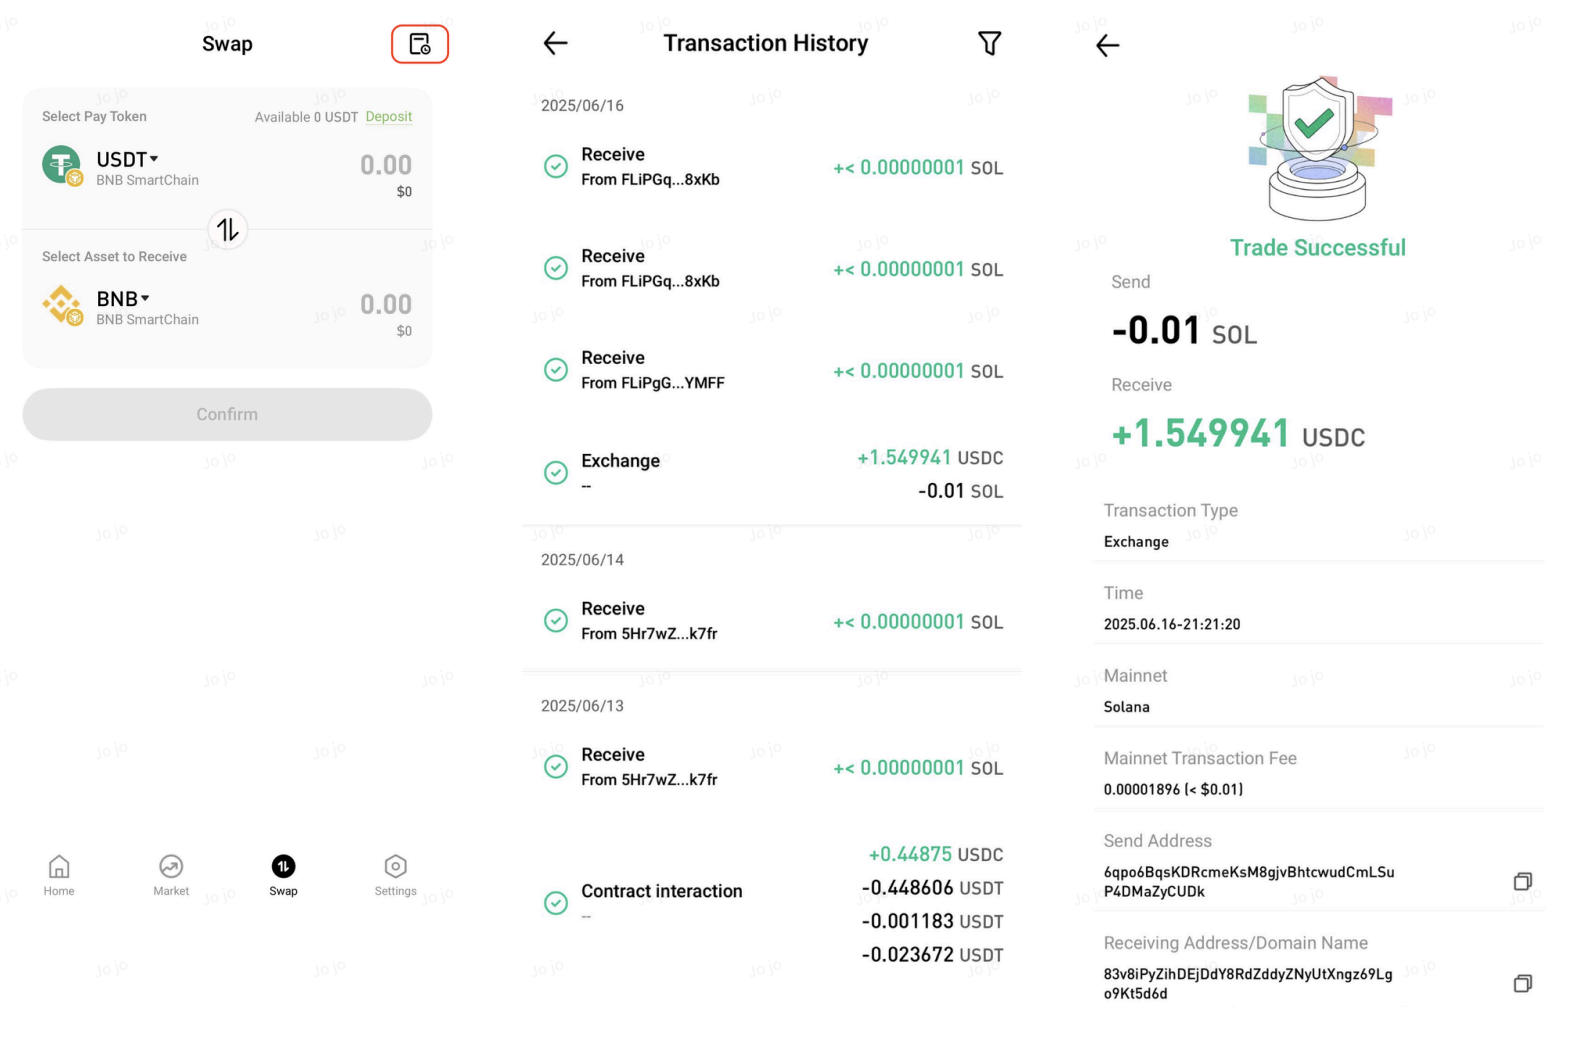
Step 3: Swap Tokens
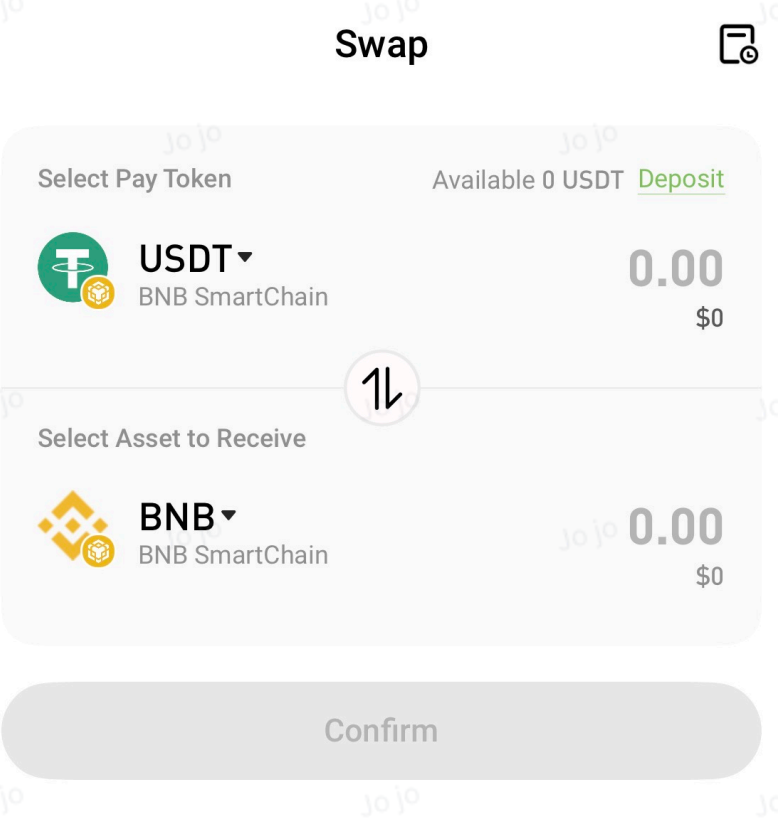
1. Open your wallet and tap Swap to enter the swap page.

2. Under Select Pay Token, select the token you want to spend. Under Select Asset to Receive, select the token you want to receive, then enter the amount to swap.
3. If prompted to approve a token first, tap Approve XXX Token. A signature request will appear. Review the details and sign the request. Wait a few seconds until the system displays "XXX Token Approved Successfully."
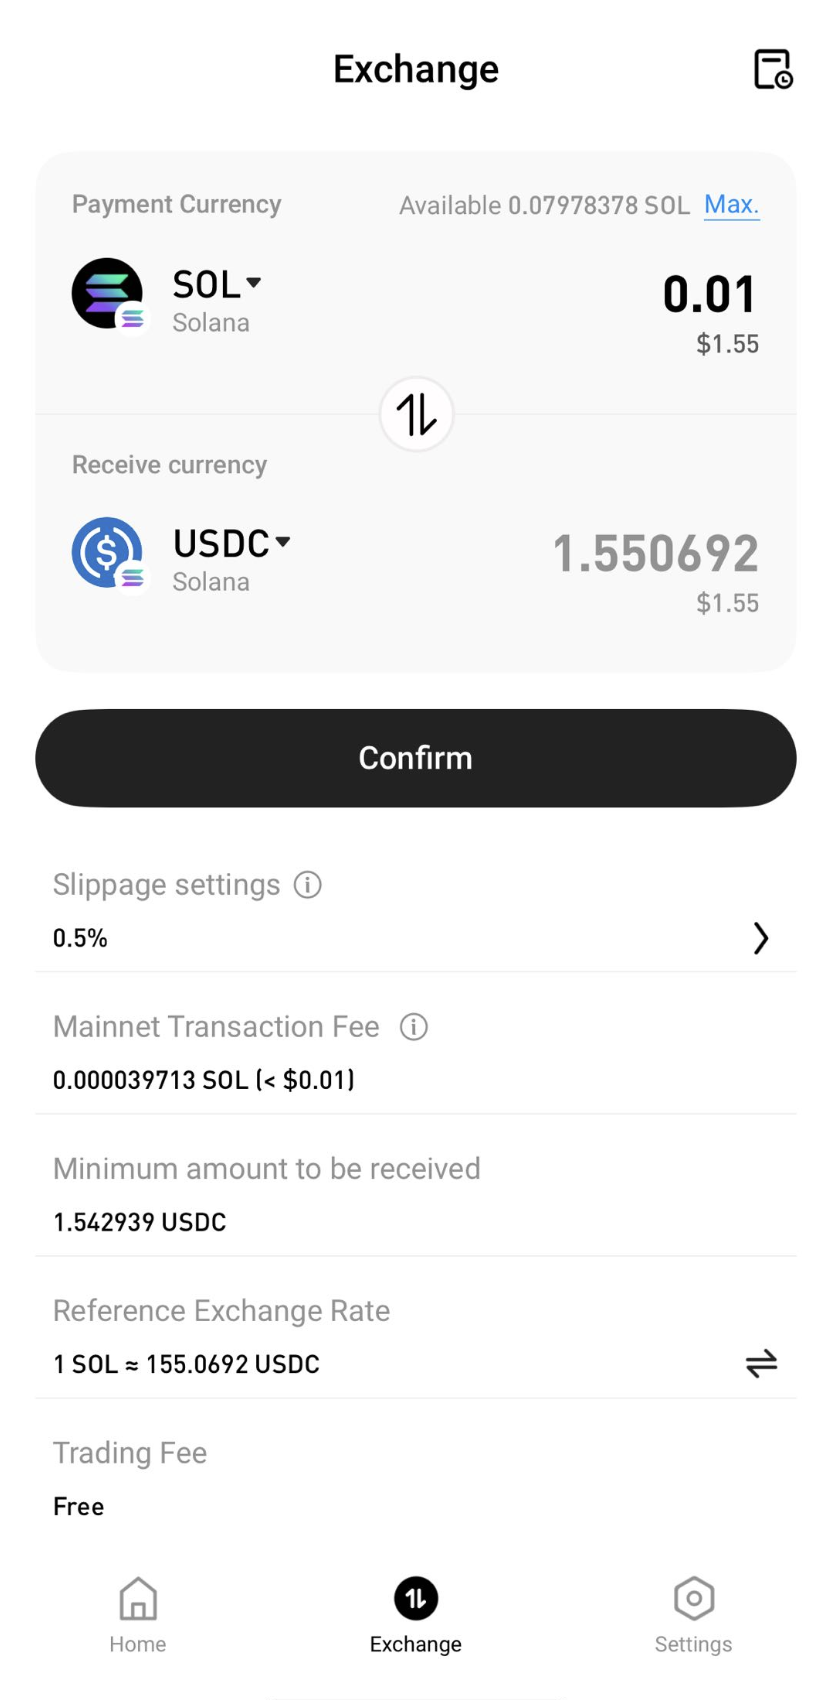
4. Once the approval is complete, the Confirm button will become available. Tap Confirm, review the transaction details in the signature window, and sign the transaction.
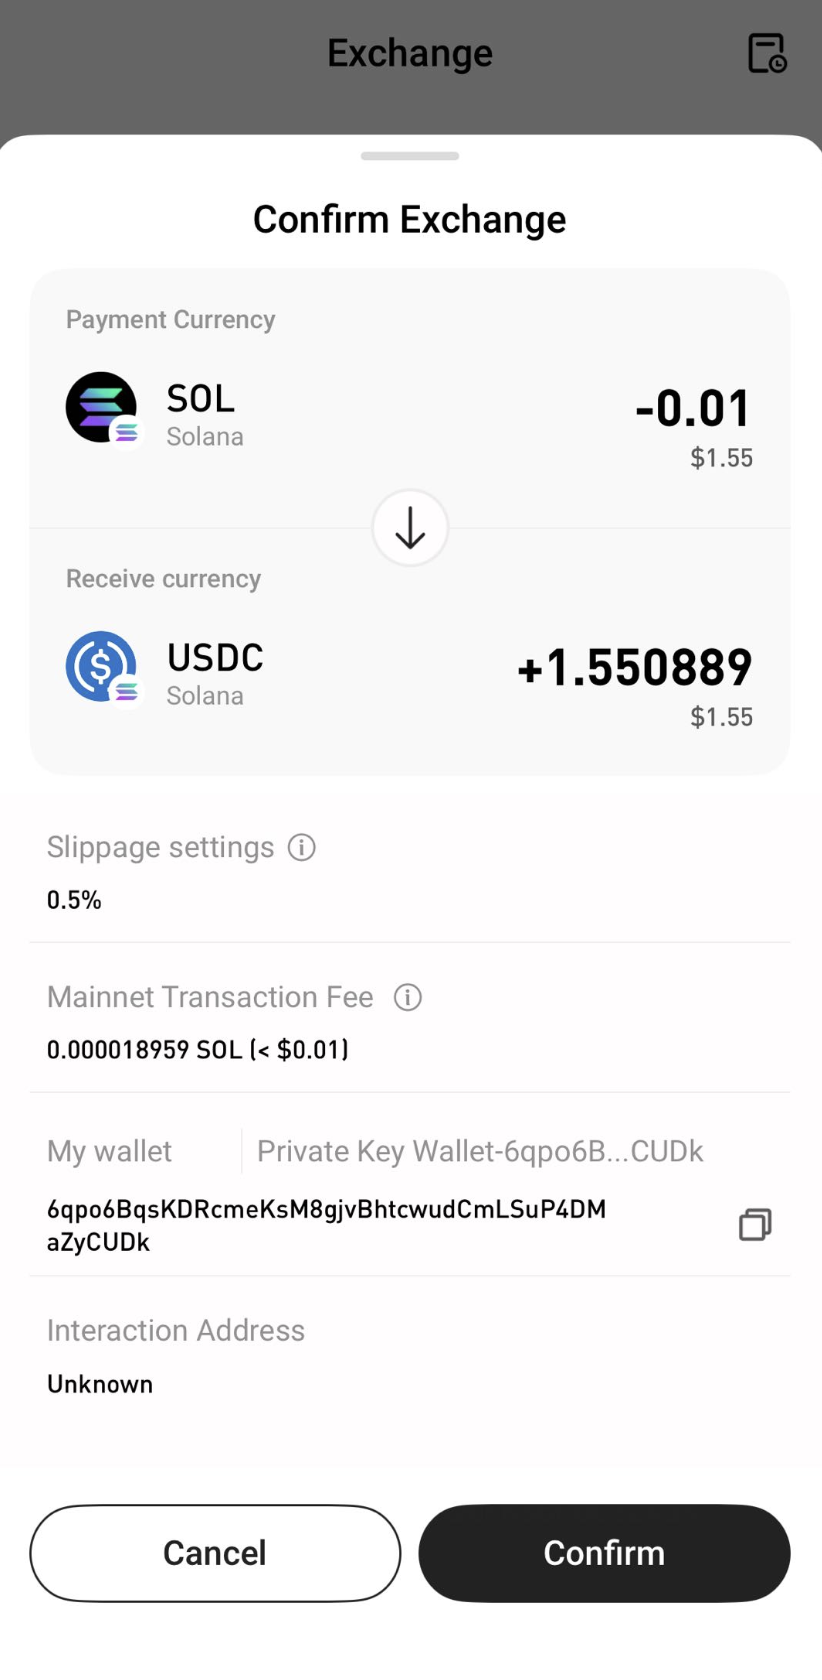
5. After signing, the swap transaction will be submitted automatically. Wait a few seconds until the system displays "XXX Token → XXX Token Swap Successful."

You have now completed a token swap.
Step 4: View Transaction History
On the Swap homepage, tap the Transaction History icon in the upper-right corner to view your swap history.